Log in to Drop & Go
Already a customer?
Go to our log in page to access your account and dashboard
If you’ve got a bunch of parcels ready to send in the post, a Drop & Go manifest is a way to capture what they contain, where they’re heading and the services you’d like to use to get them there
For each item you’re sending it lists:
It also asks you for a couple of other details. This information helps the team at your receiving branch make sure each item gets the right kind of postage and prevent delays in processing and posting them
The quickest way to fill out a Drop & Go manifest is to do it through your online account. That way several of the options you need are easily available in drop-down lists
You can also upload details you’ll use often, like addresses you send to regularly, so they’re easily to hand in one place the next time you need them. We’ll come onto how later
In the next section we’ll walk through how to complete each part of the sheet online. Once everything’s filled out, you just print the sheet, bring it into branch with your post and we’ll take it from there
Find out how to quickly and easily import your orders from eBay into your Drop & Go manifest
To add items to you send list: log into your Drop & Go account and click on the 'Send items’ tab in the navigation menu.
Click 'Create new list' or one of your saved lists.
Click the ‘Add new item’ button to add a first item to the list of goods you’ll be sending.
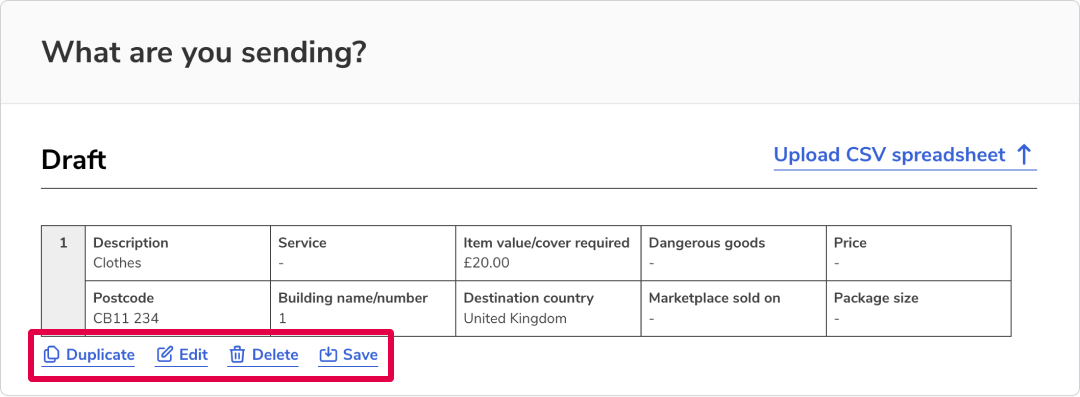
Now you’ll see a set of fields to complete in order to add a new item to your send list:

Once you’ve added your first item, repeat the process to add the others you’ll be sending with it.
You can copy item lines if you need to create duplicates, edit the details of items, delete items if they’re no longer needed, or save items that you’re likely to need in a future list.
If you’ve already saved an item, you can now view and add your saved items into the current list you’re populating.
When you’ve have added all the items you want to send to your list, you can either export your Send sheet to print it out or save it to edit or add more to later.
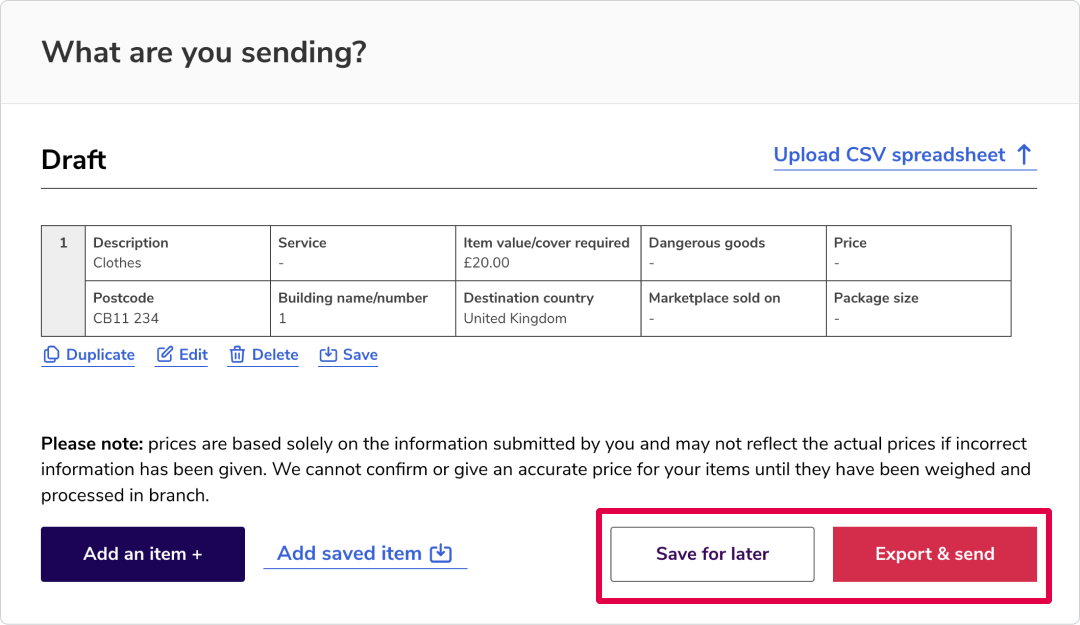
If you click ‘Save for later’ your draft manifest will be added to your ‘Send items’ dashboard.
You can save up to 50 lists in your account and edit and delete them as you need to. Saving lists also comes in handy if you send the same parcels regularly to the same customers, clients or other recipients.
If you click ‘Export & send’, a PDF of the items in your list will be created ready to print.
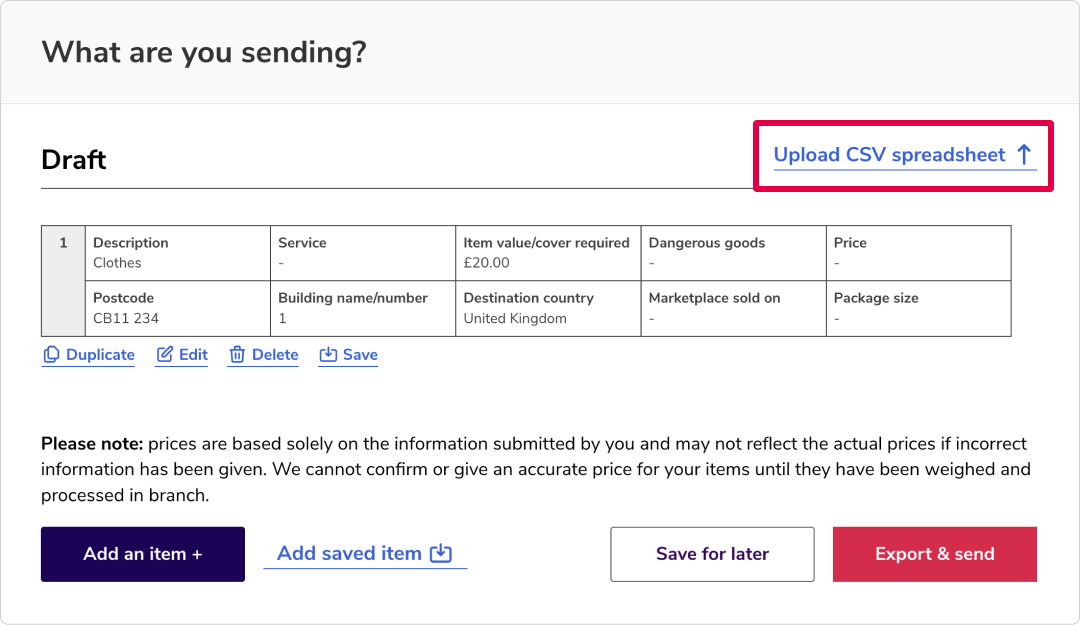
CSV documents are simple, plain-text files that contain lists of data. If you use them to keep track of the items you send, you can upload them directly into your Send sheet. Their data will be carried over automatically, so there’s no need to enter it manually.
1. Start with our Drop & Go CSV template or make sure your own CSV file has columns named the same as the Send sheet fields covered earlier in this guide.
2. Make sure every row and column are filled in, from the first to the last, as the upload won’t work if information is missing. It might look something like this:

When you're happy that everything is populated correctly press 'Upload CSV Spreadsheet' link highlighted:
1. Find the file you want to upload. You can choose the file format (eg eBay or Amazon CSVs).
2. Once it’s uploaded, our system interprets your data and carries it over to the relevant fields on the Drop & Go manifest.
3. Make sure you check everything over to make sure it’s all correct and nothing’s missing (eg there may be some minor errors to amend if your CSV format doesn’t align perfectly with ours).
4. Then just choose ‘Save for later’ or ‘Export & send’ and complete the last few steps as described earlier.
Already a customer?
Go to our log in page to access your account and dashboard
Ready to sign up?
Head to our registration page to create a new Drop & Go account